Tuesday, May 27, 2014

Solar Cooking: Feta Chicken & Banana Bread

Feta & Tomato Chicken


I tried out a main course for the first time.  It is not a “Sun Oven” recipe.  Instead, it is one I throw together occasionally.    

Ingredients
Fresh Spinach  
Feta
Balsamic Vinaigrette Dressing
Diced Tomatoes
Chicken Breasts


I cooked in for a couple hours in the Sun Oven.  It came out as good as my traditional oven.   The chicken just fell apart as I put a fork in it.  I coupled the dish with a baked potato.  It was amazing!


I have only made banana bread from scratch 2-3 times ever.  I have not had much luck with it.  It has been thick, dry, inedible, and/or bland.   Each time I picked a “delicious” recipe.  The last time I even tried to make the modifications suggested by users.  No luck.  I just threw that one away!  

I decided to try again with the Sun Oven.   I followed the Sun Shine and Banana Bread recipe precisely (except for replacing whole wheat flower with regular all-purpose).   I checked on the bred at the suggested time for it to be complete (1.5 hours).   The top did not look done at all though the fork went through with minimal markings.  Since it was overcast, my oven was only getting to 150 degrees (half the temperature I have normally been cooking with).  I adjusted the oven and let it cook a while longer.  When I checked about 45 minutes later, there was no change in the temperature or look.  As a result, I put it in my oven at 350 until it look brown at the top. 


It was relatively moist and cooked completely, but the flavor was not what I was hoping for.  It is edible, but not delicious.  I am not sure what I am missing with this recipe!  

Saturday, May 24, 2014

Gardening: Some Trial and Error Using Earth Boxes and Other Containers


I spent a lot of time “preparing” to garden, but doing nothing to start because I was so afraid of failure.  Then, someone told me that much of gardening is trial and error.  Honestly, it freed me up as perfectionist to not get upset or discouraged when things don’t work too well.   Here are a few of the trials and errors I have been working through.  

I started my morning today with a little gardening.  I added some tomato plants I bought (1.77 for 4) since my tomato seedlings did not take (still working on getting the seedling thing down).  I put 2 in an Earth Box ($40) which is a “fool” proof system.  What appealed to me is that everything is included in the package except the dirt. It was easy to put together (There are videos on their site.).  The site provides guidelines for planting which I appreciated a lot since I am a novice.  Another aspect I like is the watering system—you can never over or under water!  You simply add water in the tube at the top which becomes part of a reserve under the plant.  When it is full, it begins to overflow at the bottom.  This system allows for you to “forget” to water if you are super busy or to go away a few days without worrying about your plants.  Check out the Earth Box website if you are interested in learning more about this system.  It is ideal for container or patio gardeners. 

I also re-potted 2 tomato plants in some inexpensive containers I found at Wal-mart (under $5 each).   I did it in part to save money (a lot cheaper than an Earth Box) and to test if there is any difference in the plants between the two systems.   These containers also have a water reserve at the bottom.  

In addition, I separated the 2 inexpensive containers into 2 locations to test out which place (if any) seems to do better (front or back of house).  Wal-mart also had some bamboo in the garden area for under $3 which I bought to make a tomato support system later on.    

I am having some trial and error with where to put my plants.  I wanted to put them on my deck, but it is in need of repairs (hopefully they will get done this summer).  I put them on my back patio, but they were clearly not getting enough sun.  I moved them (luckily the Earth Boxes have an option to add wheels) right off the patio and into the grassy area.   I also made the error I using the white side of the plant cover.  Since normally we have such hot summers (it has been unseasonably cool) and it seems like my flowers at the back of the house get scorched, I thought white (reflecting rather than absorbing) would be better.  Today, I use my extra covers and re-covered them using the black side. 

I re-potted the 2 additional cilantro plants I had.  I put those in the garden area because I have heard that deer do not like the smell, which keeps them away from the other plants.  I also have lavender and marigolds in the garden area.  They deter garden pests of all kinds. 

So far, I am enjoying gardening immensely, even with all the trials and errors.   It is a great outlet for me in the summer months when I am not working.   

Friday, May 23, 2014

Benefits of Growing Aloe Vera

I grabbed an aloe plant at my local nursery this week.  Growing up in Florida, we often had aloe plants.  For a fair skinned gal like me, they came in handy.  I remember one house we lived in there was a live plant growing in a partial wall dividing the dining room and living room areas.  Most of the time there was a plant growing outside of the house though.  We used it whenever someone had a sun burn. Now that I live in a cooler climate and rarely go outside without sun screen, I forgot about aloe until one of my children got sunburned a couple years ago. I remember spending a pretty penny on some pure aloe at the drug store for him. 

As a prepper, I felt adding an aloe plant to my supplies would be beneficial.  Before re-potting it in a cute little terracotta container, I spent some time reading about it.  The Garden Helper has a concise but helpful overview.  Then, I found this amazing blog called We Love Aloe.   It has information, recipes, and news exclusively about this powerful plant.
 
I learned that aloe is not only helpful for sun and other burns, but it has many other health benefits.  Aloe can be used for cuts and rashes (including poison ivy).  Also, many people use it as part of their beauty routine.  For instance, We Love Aloe gives instructions on how to create a mask to fight acne and how to use it to improve your hair’s condition. When ingested, aloe builds up immunity to viruses (like flu) and cleanses the digestive system.   For much, much more, take some time to peruse their website. 

The “Reading Aloe Leaves” section is especially beneficial.  It reveals when a gardener needs to adjust watering or sun exposure as well as when to prune the plant. Fortunately, aloe is easy to care for.  In the winter, for instance, you may only need to water once every week or two.  

Along with the aloe, I re-potted some cilantro I found at the nursery. (I tried growing from seeds, but so far no luck!) The plants are looking a bit droopy, but I hope being in a new home will bring them back to life!  I put a little arrangement together, including an adorable watering jug, on my deck. 


Thursday, May 22, 2014

First Solar Cooking Experience!

Today, I tried out a couple easy foods in my Sun Oven, which has helped me feel more confident and excited about solar cooking. 


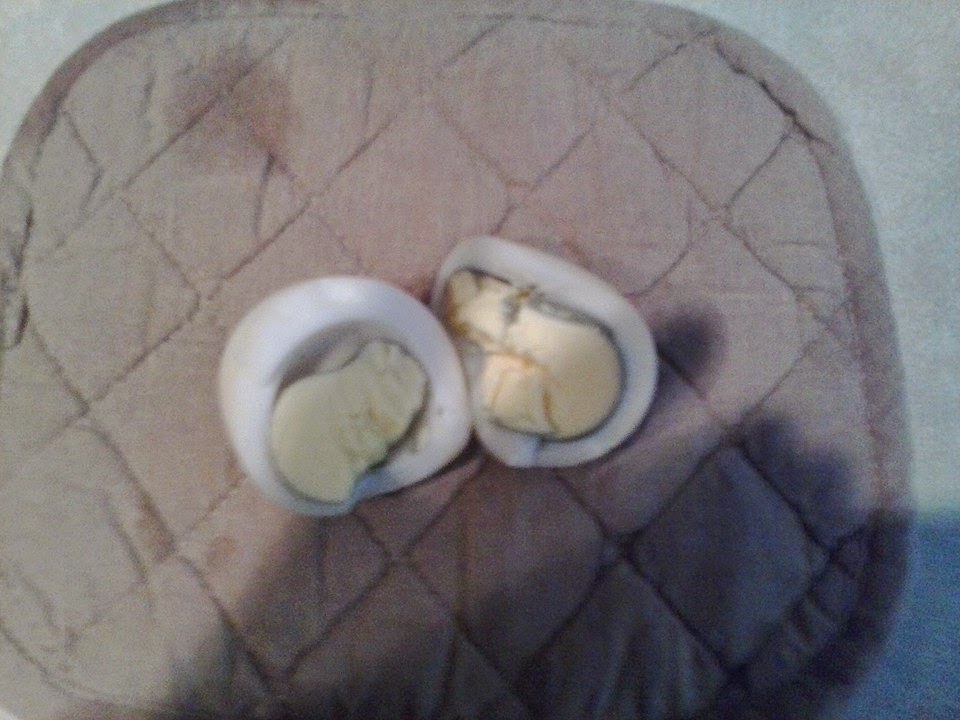
First, I hard boiled some eggs.  According to the instructions I found, all I needed to do was get a dozen eggs in a cardboard/paper carton, remove the lid, and place in the oven.  No water is needed. The directions suggested about 90 minutes in the oven.  Of course, cooking time varies with the intensity of the sun, but the times give a good estimate.   I put them in the oven and left to run some errands.  I was gone about 2.5 hours (so about 1 hour over the suggested time).  

When I removed them, I placed them in ice water to cool.  There were some brown spots on the outside of the shell, so I was concerned they were ruined from overcooking.  Then, I opened one up. The yolk looked perfectly cooked, but much of the white section was a light brown.  I almost tossed them.   Nevertheless, I tried a bite.  It did taste a little overcooked, but edible. 

Next, I put in 2 layers of chocolate chip cookies.  I checked on them about every 20 minutes.  In about 40-45 minutes they looked done.  I tried one.  It was gooey and warm.  I let it sit a few more minutes and removed.   About five uncooked cookies were left over, so I put them in the traditional oven.   Coming out, they were the same color and texture as the Sun Oven batch. 

However, I noticed a big difference in taste.  When I ate one of each about an hour later, the Sun Oven cookies were firm yet still soft.  The traditional oven cookies were hard as rocks!   After school (about 4 hours later) my son tried one of each.  He loved the Sun Oven batch, promptly eating several while ignoring the other ones. 

If you get a solar oven, don’t be intimated by it.  Try out some simple items like eggs and cookies to build up your confidence. 

Next, I am looking for the perfect dinner recipe to cook in it!     

Wednesday, May 21, 2014

Planting Potatoes in Burlap Sacks


I was hoping to be able to use my solar oven today. Instead, I spent time with some good friends (one is visiting from out of town).  I did not waver from my goal of doing something self-sufficient each day this summer though.

I am gardening for the first time, primarily with containers.  The downside is the initial expense of the containers.  Fortunately, I found an inexpensive way to plant potatoes--thanks to the Internet.  

I purchased burlap sacks at a local nursery for only $1.00 each.  The only difficulty with this task was getting a sweet little black & white cat to move off her sleeping perch on top of them. Also, be sure to give the sack a once over look. Some of the sacks I came across had large rips on one side.


My nursery also had potatoes buds.  I bought 2 different kinds for $1.75 total.  I have enough to plant 4 sacks. 

The only other expense is something to plant them with.  I used a bag of Miracle Grow for vegetable gardens (cost about $7.00).  On Youtube, I saw videos where people used compost (free if you make your own), straw, and even shredded paper.  For now, I am sticking to the Miracle Grow.  

I planted 2 sacks in the cool of the evening.  It was super quick and easy.  Anyone with a porch, deck, or balcony can use this method.   All you do is fold the sack down til it is about a 10 inches high.  I filled in the bottom 4-5 inches with soil.  I placed the potatoes in and added a few more inches of dirt.  Finally, I watered.  

According to the videos and information I reviewed, I will need to roll the bag up and add dirt periodically as the plants grow.  Eventually, the whole bag should be full of potatoes!  

One of my fellow prepper friends convinced me that potatoes are the way to go.  In a long term crisis, the ability to grow your own potatoes would be essential.  First, growing potatoes in sacks like these take up little space and can be stored just about anywhere.   Second, you can keep the process going easily by setting a few potatoes aside after each harvest to re-plant.  Third, potatoes are an excellent staple that can be used as a whole nutritious meal or as a compliment to other foods.  

Still need convincing you should grow potatoes as part of your own self-reliance plan?  Check out this website on the health benefits and nutritional value.  


Tuesday, May 20, 2014

Sun Oven Preparation & Benefits


Preparation
I longed for a Sun Oven for over a year.  I received one in the mail about a month ago.  I did not begin using it right away because I was part too nervous and part too busy.  Nervous was the biggest part of it though.  Whenever I plan to try something new, I tend to get anxious and procrastinate.  Today, I finally pulled it out of the box!  There was a little prepping involved.  

1.  I read a lot.  I began by reading Cooking with Sunshine (by Lorraine Anderson & Rick Palkovic).  Also, I went through all the information that came with the oven, including the CD.  

2.  I removed the oven and took inventory of the items included.  I was pleased to receive in the package everything I need to begin cooking, including 2 bread pans, 2 all-purpose pans that fit on top of each other, 3 drying racks, WAPI, and parchment paper.  The CD that came with it (though poorly edited) was extremely helpful.  It includes Sun Oven recipes, videos, instructions, and tips.  The software on the CD allows for a user to "capture" web recipes and add them to personalized electronic cookbooks.  Once the recipes are in, there are easy menu and grocery store planners embedded in the software.  

3. Then, I carefully peeled off the protective cover film on all of the sun screens.  

4.  Next, I carried the oven outside. I was surprised how easy it was to work with.  There is a handle on the oven, so I was able to carry it like a suitcase. I effortlessly set it up and moved it around. The oven was not nearly as intimidating as I thought it would be.  

5.  The instructions state to initially leave the oven in the sun for at least 90 minutes with an open pan of vinegar.  About 2 hours later,  I used the vinegar to wipe down the oven.  

6. I washed all the pots and accessories that came with the oven and found a place in the cabinets for them.

Now, I am officially ready to begin my solar cooking journey!  

Benefits

My initial reason for wanting a Sun Oven was to help my family be more prepared in a crisis.  There are several other benefits I have found in my reading.

1.  The oven can be used as a dehydrator.  I have been looking at electric dehydrators the past few months.  I nearly bought one.  Then, I realized the Sun Oven will do the job without electricity.  The 3 drying racks can be used for dehydrating foods (or making cookies).  

2.  The oven can be used to purify water. It cannot purify mass amounts, but in a pinch it would help.  I also have a water purifier for larger quantities.  The package included a WAPI which is a device that is used to help determine when the water has been brought to the proper temperature to be safe for drinking, cooking, or washing.

3.  The oven lowers energy bills.  It both saves energy (money) by not using a traditional oven and in the summer by not running the AC to counteract the heat from the oven.

4.  The oven can cook multiple items at once.  I have heard stories of people putting in a pot roast, a cobbler, and a side vegetable at the same time.  As long as it can fit in the sealed Sun Oven box, it will all equally cook.  

5.  The oven helps lock in many of the natural flavors and nutrients lost in traditional cooking.  Food doesn't dry out or burn.  It is a win-win for novice and health-conscious cooks.  

Monday, January 13, 2014

Why I Became a Prepper


My whole adult life, I was able to go to the store to get what I needed.  I never had much in the way of a stockpile.  Honestly, I never thought about it.  One of my good friends was a crazy couponer.  I tried it a few times, but never used more than a few coupons.  In my busy life, I did not have time to deal with it.

However, everything changed when I was laid off.  I had as little as $40 to buy my week’s groceries. I often had to wait to buy basic household items like paper towels and personal items like deodorant.  I was stressed and depressed!  

Once, after waiting a couple weeks, I had money to get some items I needed.  I walked out of Wal-mart, having spent $100 on just a couple bags of basic household and personal items.  It was all the “extra” money I had! 

I knew I had to do something!  As Scarlet O’Hara famously states, “As God is my witness, they’re not going to lick me.  I’m going to live through this and when it’s all over, I’ll never be hungry again.  No, nor any of my folk.  If I have to [prep, farm, coupon, and can.]  As God is my witness, I’ll never be hungry again.”   [italics is my take on her “lie, steal, cheat, or kill”] 

I was never “hungry” physically.  We got by—barely.  However, the situation taught me how close I am to hunger and to need.  That experience is the driving force in everything I do now. 

One of my other crazy friends (and I do mean crazy) taught me some basics of couponing and walked me though the process.  We often met to coupon—even late at night.  I soon became addicted!  (Now, I am actually more extreme than both my crazy coupon friends.)

Just a few years later, I have enough food to last through most emergency situations.  I am well-stocked on household and personal items; many were free or nearly free.  All of it is a result of couponing. 

Fortunately, I am no longer in a situation where I am strapped for cash to purchase basic items.  Now I get to save and to wait for things I want related to prepping.  While I feel more confident in our financial situation, there are so many other risks like an EMP, power grid issues, hyperinflation, or a natural disaster. 


As a result, I am on an adventure to learn self-sustaining skills like gardening, canning, and dehydrating.  

My long-term goal is to build my own backyard homestead with chickens, bees, and (maybe even) goats. (Still working on getting my husband on board with the animals.)

Another goal is to learn and to practice meal planning and food rotation.  

Finally, I need to learn to cook more skillfully and healthily too. 

I began this blog to share some of what I am learning and doing, in hopes that my journey may help others.